Building a steamer box.
Sounds easy enough.
Steam allows wood to more easily conform to the surface of the structure. Structurally, wood is made of cellulose and lignin. During steaming, the heat and moisture causes the lignin to become unbonded from the cellulose, allowing it to become more easily deformed. Once the wood cools, the lignin rebonds to retain the new shape.
In the past I used 6in. PVC drainpipe and wood dowels as a steamer box, but I wanted the ability to steam more pieces at a time.
I built my first steam box out of foil-surfaced insulation foam board and steel wire. It worked well...once or twice. The steel wire almost immediately rusted as the tannic acid, leached from the wood, made the steel corrode in one day. I tried to use it anyway, but it deeply stained the wood black wherever it made contact.
My second attempt used galvanized wire that was twisted for strength. It worked for about a week, before the acid eventually ate through the galvanized surface.
My third attempt was to replace the metal shelves with wood ones that would not corrode and stain the wood. This arrangement lasted for about a month before the foam board became waterlogged and started to sag and break down.
My fourth attempt at building a lasting steamer box had me going back to the hardware store to build by original PVC pipe plan. As I toured around the store imagining the possibilities, I stumbled upon a 6" square PVC post used for fencing. "Perfect!" I drilled it out to create two interior shelves out of 5/16" oak dowels. The finished product looked great, very professional.
After my first use, the PVC post, softened, drooped and collapsed in on itself. I resounding FAILURE! I didn't even have time to take a picture of it.
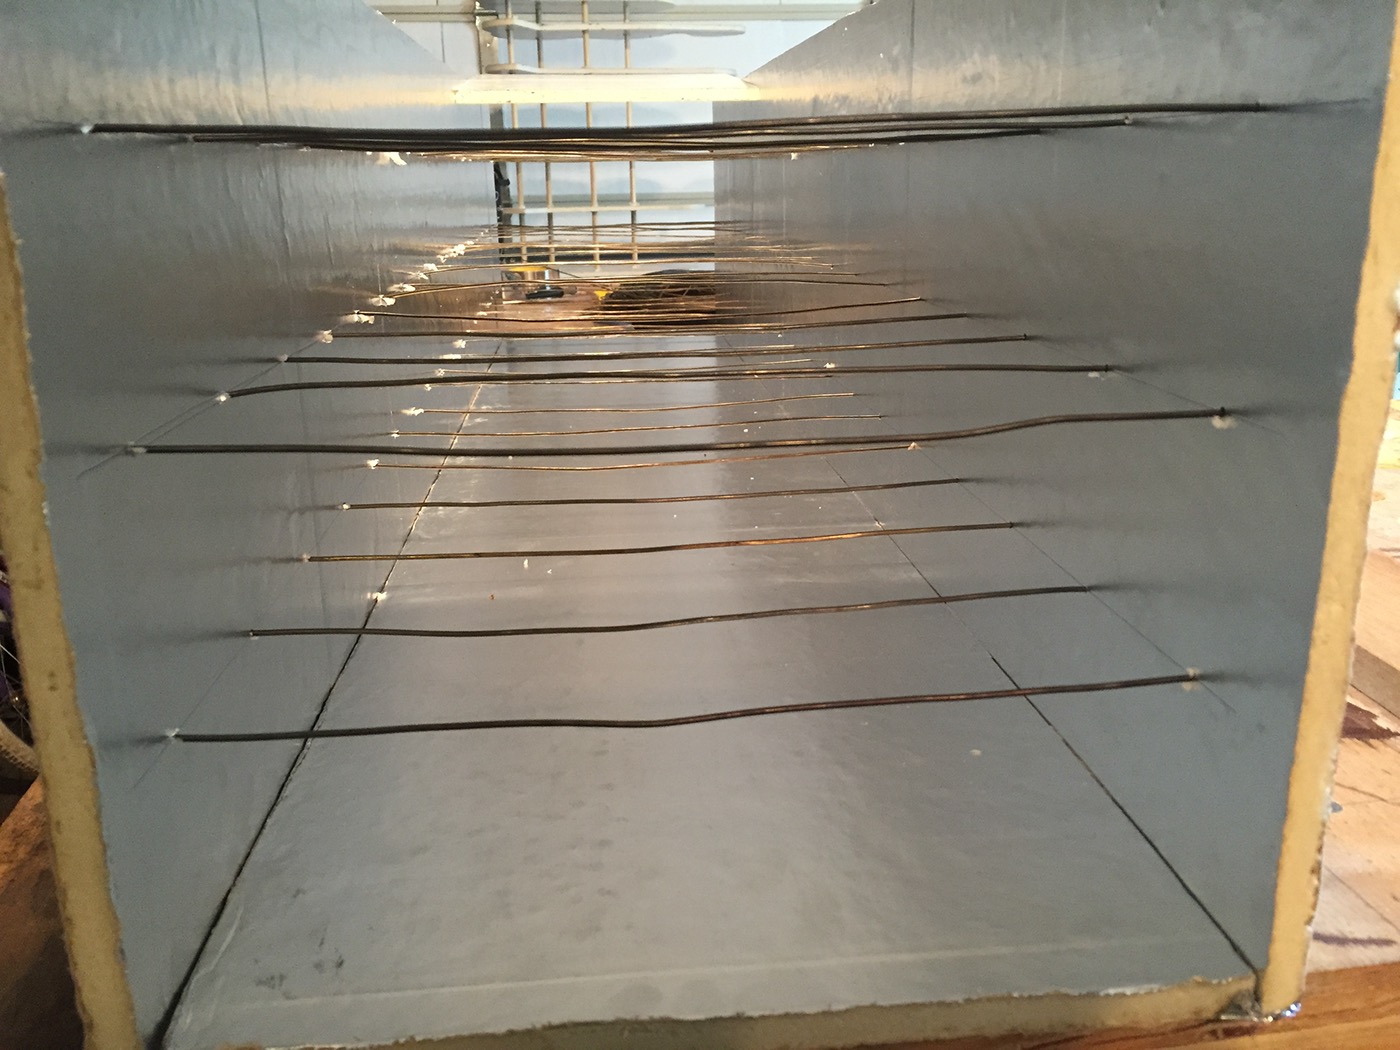
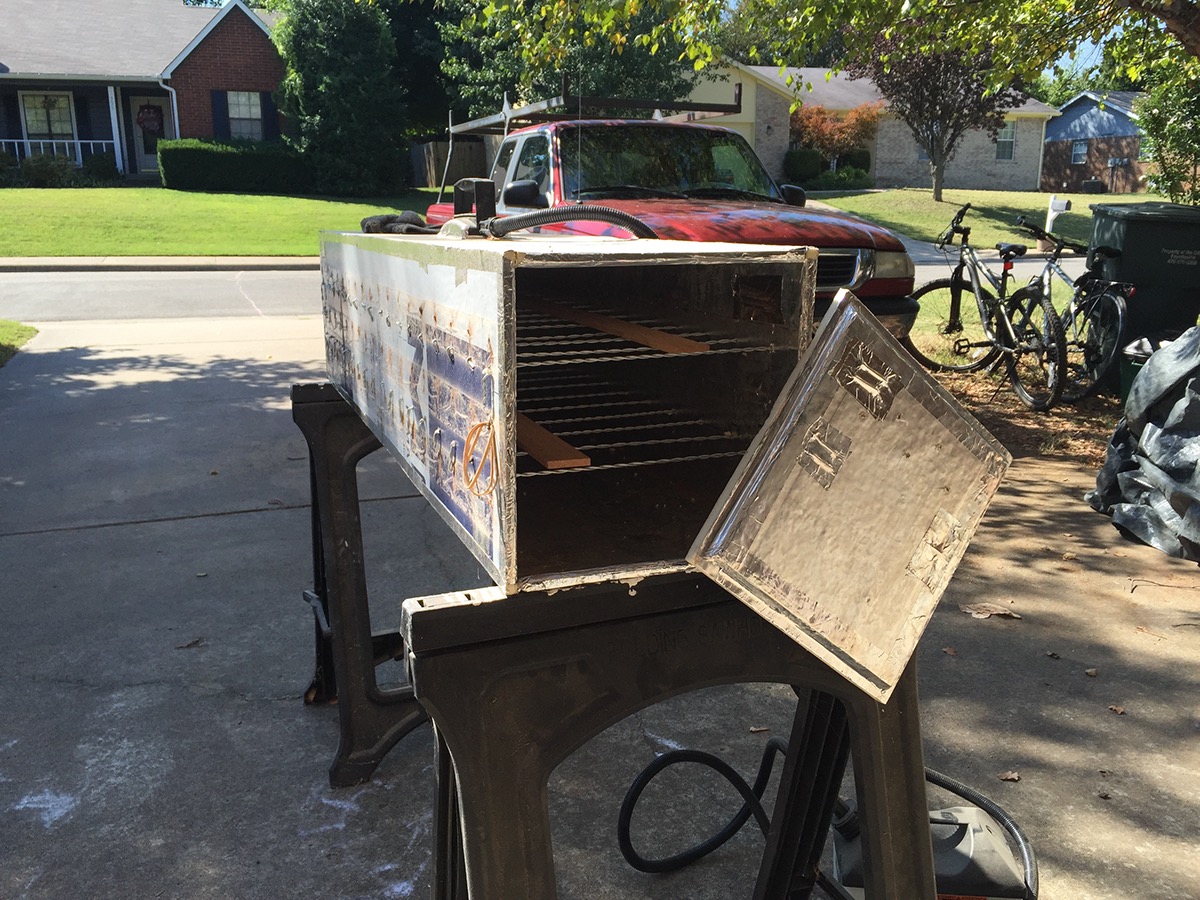
My fifth and current steamer box is made of plywood and lined with heavy-duty aluminum, heat-resistant adhesive tape.
So far the steamer is holding up well.
I generate steam with a wall paper removing tool that boils a gallon of water at a time, giving me about 75 minutes of continuous steam. I will update my trials, if I find that I need to build a new steamer box. I certainly hope not.

At this point, I know I have to just jump into it and make mistakes in order to figure out the process.
The quicker I fail, the sooner I can learn to do it right.
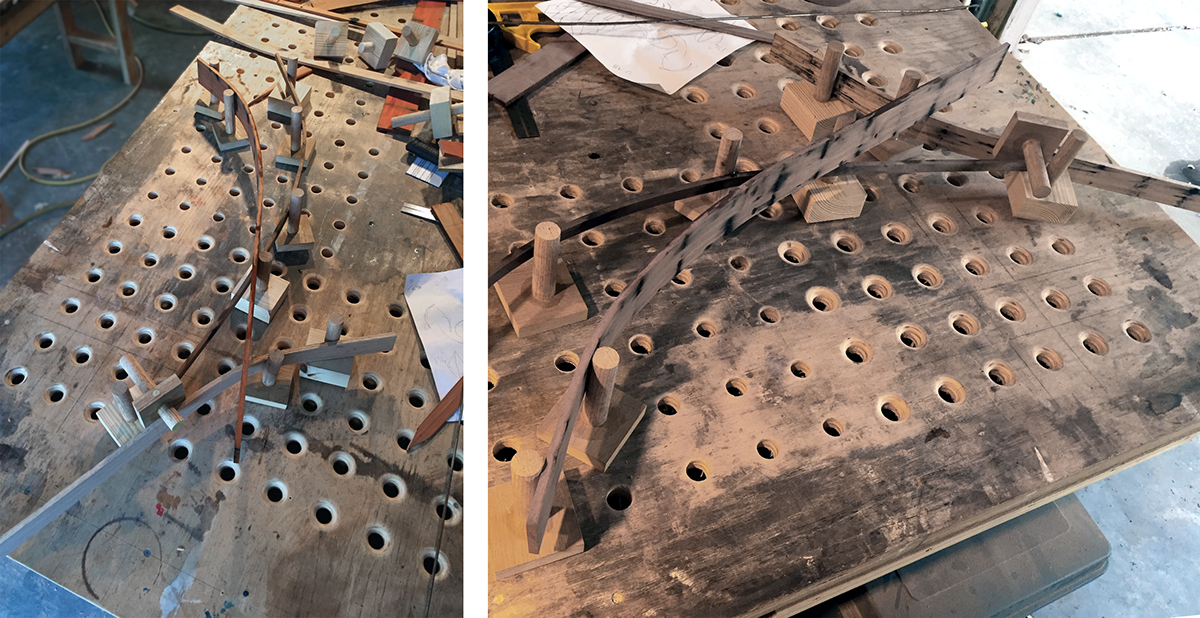
The first couple of strips taught me what length/gauge of nails to use, that I should splice the wood strips end-to-end with a 45° cut on a 30° bevel, how to bevel the long edges at a 10° angle, how to record the needed bends and how to best set up my bending jigs to get complex curves, among other things.
I ended up removing all the strips in the picture and starting over.


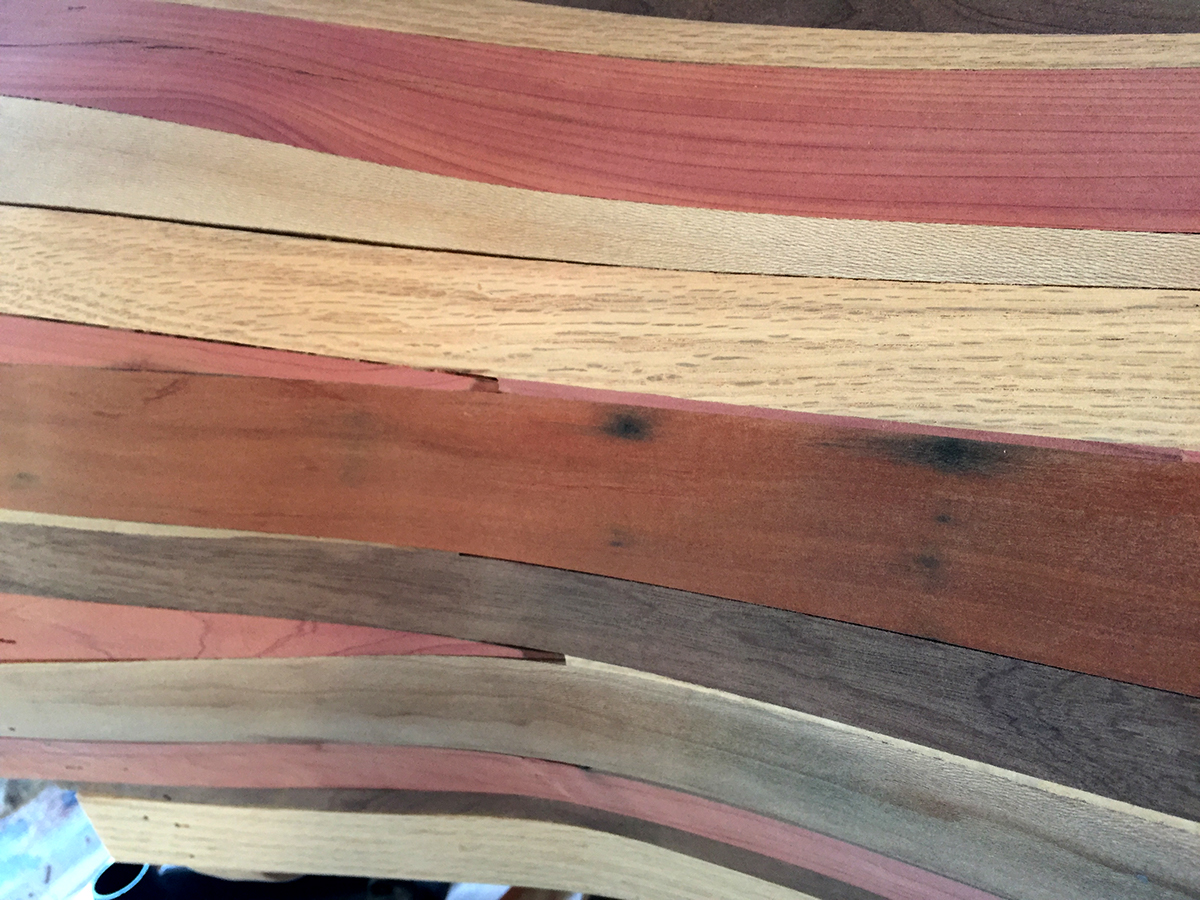
Each strip is beveled, steam bent and fitted into place.

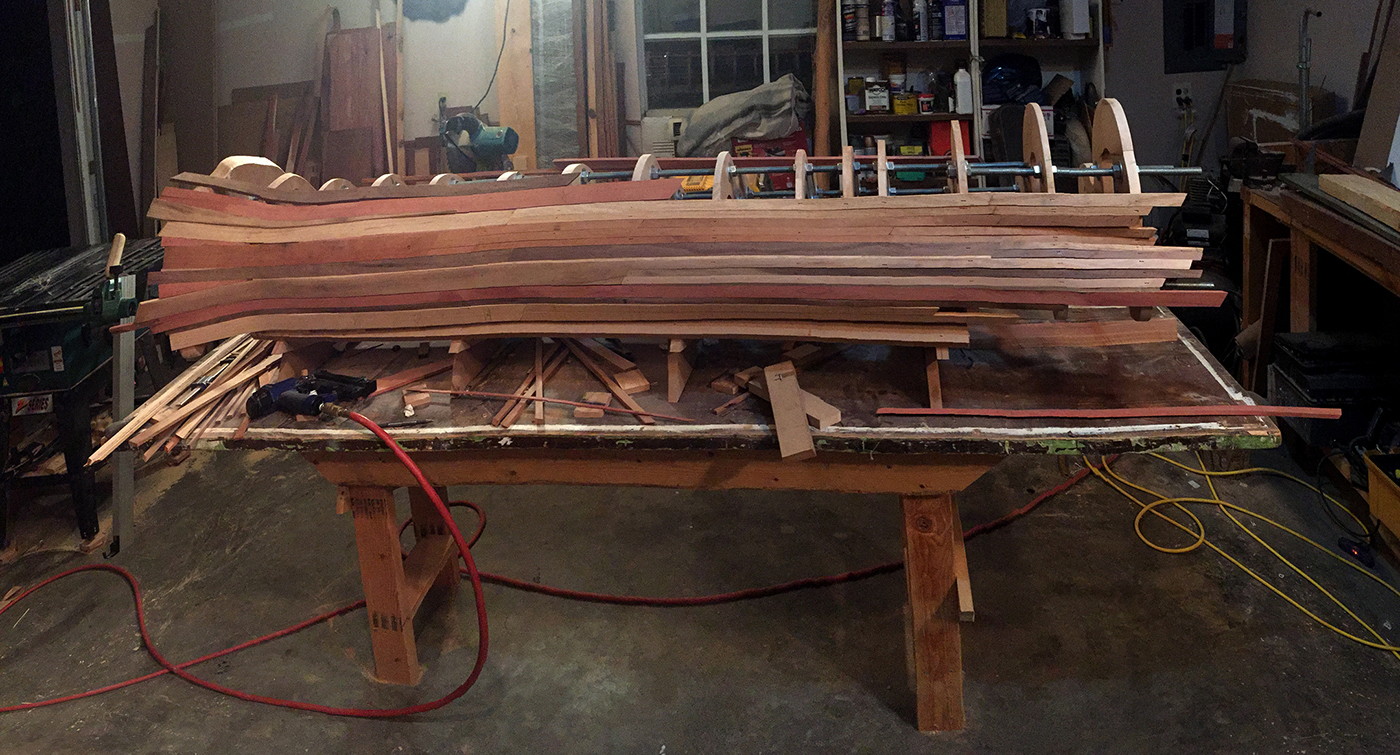

I turned the surface of my worktable in to a variable bending jig, with interchangeable support pegs. This setup allows me to create compound bends quickly and accurately.

I finish each section by filling in the tiny gaps with strips of a contrasting wood. I cut the strips on the table saw with a 5° triangle profile.
I can't wait to see the wood come alive with the Danish Oil finish.
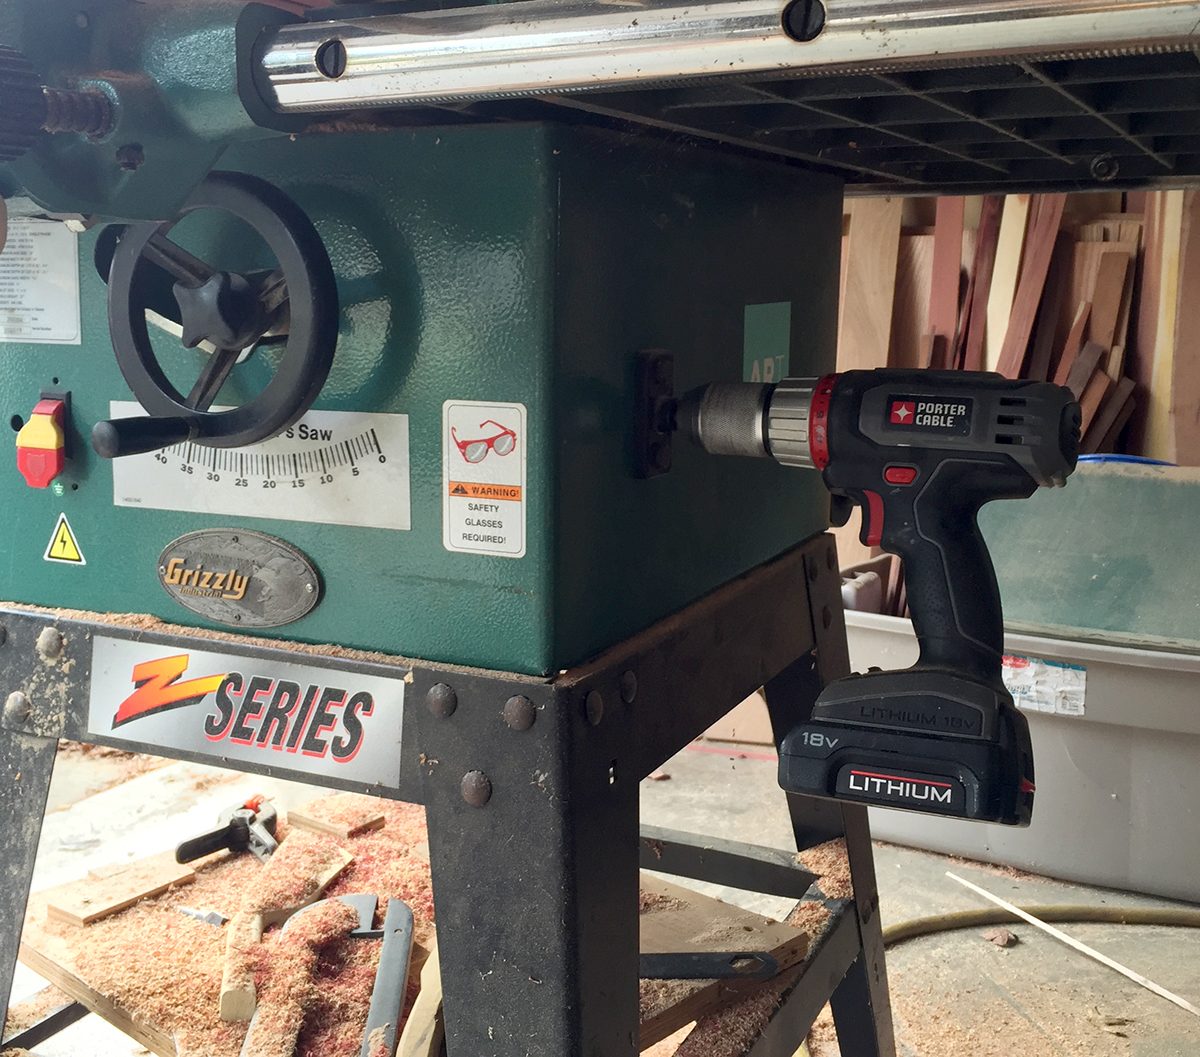
After hand-cranking the angle adjustment on the saw over-and-over again, I decided to put an unused cordless drill to work.
It works like a charm while saving my arm.